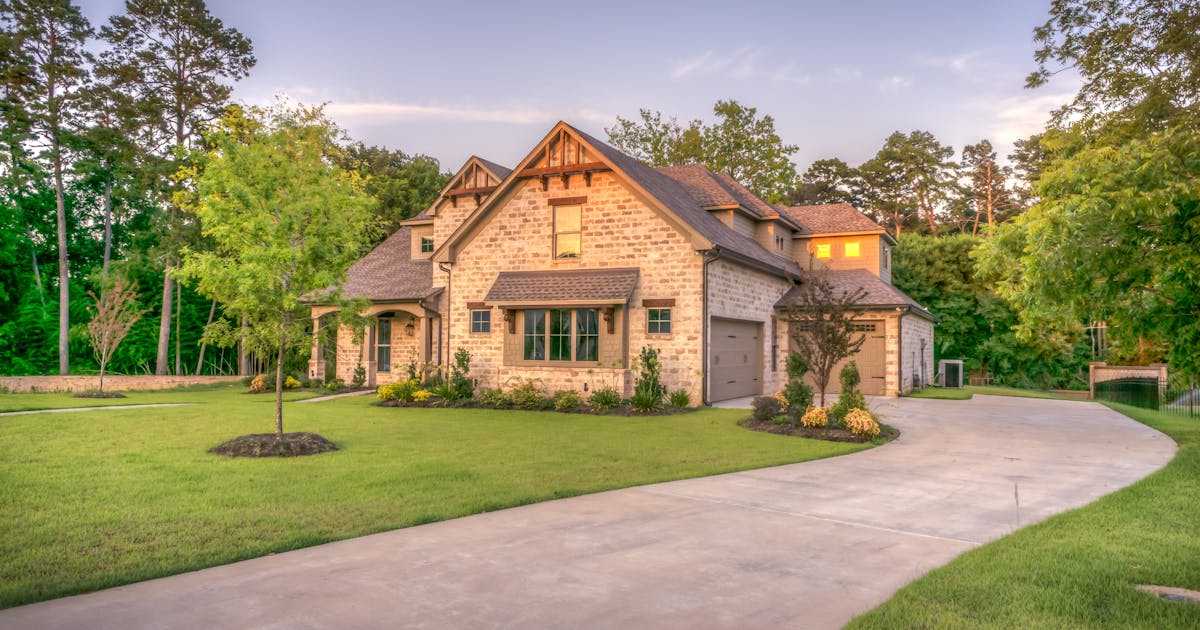
If you’re like most Nashville homeowners I’ve worked with over the years, you probably think concrete cracks are just an unavoidable fact of life. Understanding concrete cracking is essential for any homeowner. I used to believe the same thing—until I watched a perfectly good $8,000 driveway develop spiderweb cracks within six months because the contractor skipped a few critical steps. That’s when I realized the truth: preventing concrete cracks isn’t just possible, it’s actually straightforward when you understand the science behind it.
Table of Contents
- Concrete cracking: Why Does Concrete Crack in Nashville? Understanding the Root Causes
- The #1 Prevention Strategy: Strategic Control Joint Placement
- Expansion Joints vs. Control Joints: Know the Difference
- Concrete Reinforcement Methods That Actually Work
- The Curing Process: Where Most DIYers Go Wrong
- Subgrade Preparation: The Foundation of Crack Prevention
- Concrete Sealing: The Final Layer of Protection
- Concrete Crack Repair: When Prevention Isn’t Enough
- Frequently Asked Questions About Concrete Crack Prevention
- Choosing the Right Nashville Concrete Contractor
- The Bottom Line: Investing in Prevention
Nashville’s unique climate—with our sweltering summers, unpredictable freeze-thaw cycles, and expansive clay soils—creates the perfect storm for concrete failure. But here’s the good news: armed with the right knowledge about control joints, proper curing, and reinforcement techniques, you can protect your concrete investment for decades to come. When considering concrete cracking, this is especially important.
Concrete cracking: Why Does Concrete Crack in Nashville? Understanding the Root Causes
Before we dive into prevention strategies, you need to understand why concrete wants to crack in the first place. It’s not because contractors are cutting corners (though that happens too). Concrete cracking is a natural response to stress, and Nashville’s environment amplifies these stresses in unique ways.
The Science Behind Concrete Cracking
Concrete shrinks as it cures. It’s that simple—but also that complicated. When you pour concrete, the cement and water undergo a chemical reaction called hydration. As this reaction progresses over 28 days, the concrete actually gets smaller. We’re talking about 0.05% shrinkage, which doesn’t sound like much until you realize that translates to nearly an inch across a 20-foot driveway. This directly impacts concrete cracking for Nashville homeowners.
Now add restraint. Your concrete slab isn’t floating in space—it’s sitting on soil, connected to foundations, and bonded to existing structures. When it tries to shrink but can’t move freely, internal stresses build up. Eventually, something has to give. That “something” is usually a crack. Understanding concrete cracking helps you make better decisions.
Nashville’s Soil Conditions: The Hidden Culprit
Here’s what makes Nashville particularly challenging: we’re sitting on a thick layer of expansive clay soil. I’ve seen soil reports from Davidson County showing clay content exceeding 40%. This soil swells dramatically when wet and shrinks significantly during dry periods. This is a key factor in concrete cracking considerations.
Your concrete is essentially riding on a dynamic, moving platform. When the clay beneath your driveway expands during our rainy springs, it pushes upward unevenly. During our dry summers, the soil contracts and creates voids. This constant movement—what engineers call differential settlement—puts enormous stress on concrete slabs. For concrete cracking, this matters significantly.
According to local foundation repair specialists like AFS Foundation Nashville and Ground Up Foundation Repair, Nashville’s soil-related concrete problems cost homeowners thousands annually in repair expenses. Regarding concrete cracking, Nashville experts recommend this approach.
Temperature Extremes and Freeze-Thaw Damage
Nashville isn’t Minnesota, but we do experience freeze-thaw cycles—typically 30-40 per winter. Water trapped in concrete pores freezes, expands by 9%, and creates internal pressure. When temperatures rise above 32°F, the ice melts, leaving behind slightly larger pores. Over hundreds of cycles, this process creates spalling, surface scaling, and eventually structural cracks. This plays a major role in concrete cracking outcomes.
Our summer heat presents different challenges. When concrete surfaces reach 140°F+ under direct sunlight (which I’ve personally measured in July), the top layer expands faster than the cooler bottom layer. This differential expansion creates what’s called thermal stress cracking. Many homeowners researching concrete cracking overlook this detail.
The #1 Prevention Strategy: Strategic Control Joint Placement
I’m going to let you in on a concrete industry secret: control joints don’t prevent cracks—they control where cracks occur. It’s like pre-scoring drywall before snapping it. You’re intentionally creating a weak point so the concrete cracks there instead of randomly across your surface. When considering concrete cracking, this is especially important.
What Are Control Joints and Why They’re Non-Negotiable
A control joint (also called a contraction joint) is a groove cut or tooled into concrete to create a weak plane. When shrinkage stresses build up, the concrete will crack along this predetermined line—hidden inside the groove where it’s less visible and structurally insignificant. This directly impacts concrete cracking for Nashville homeowners.
I’ve seen too many Nashville driveways with zero control joints that look like a jigsaw puzzle within a year. Meanwhile, properly jointed slabs last 20+ years with minimal issues. Understanding concrete cracking helps you make better decisions.
Proper Control Joint Spacing Guidelines
The American Concrete Institute recommends control joint spacing at 2-3 times the slab thickness in feet. For a typical 4-inch driveway, that means joints every 8-12 feet. But Nashville’s conditions demand we be more conservative. This is a key factor in concrete cracking considerations.
Here’s my rule of thumb for Middle Tennessee:
- 4-inch slabs: Joints every 8 feet maximum
- 5-inch slabs: Joints every 10 feet maximum
- 6-inch slabs: Joints every 12 feet maximum
The maximum panel dimension should never exceed 15 feet. For driveways, I recommend cutting joints in a grid pattern that creates roughly square sections. Long rectangular panels (like 8′ x 20′) are asking for trouble. For concrete cracking, this matters significantly.
Control Joint Depth: Getting It Right
Here’s where contractors sometimes cut corners (pun intended): control joint depth matters enormously. The joint should be at least one-quarter of the slab thickness, but one-third is better for Nashville’s climate. Regarding concrete cracking, Nashville experts recommend this approach.
For a 4-inch slab, that means cutting at least 1 inch deep, preferably 1.5 inches. Too shallow and the joint won’t actually control where the crack forms. The concrete will just crack somewhere else. This plays a major role in concrete cracking outcomes.
When to Cut Control Joints
Timing is everything. Cut too early and you’ll tear up the surface. Cut too late and random cracks will beat you to it. For Nashville’s typical spring/fall weather (60-75°F), you’re looking at 4-12 hours after the pour. Many homeowners researching concrete cracking overlook this detail.
The concrete should be hard enough to resist surface tearing but soft enough that sawing doesn’t pull aggregate. Press your thumb into the surface—if it leaves a 1/4″ impression, you’re good to cut. Most contractors use an early-entry saw within 4-6 hours, then follow up with a conventional saw if needed. When considering concrete cracking, this is especially important.
Watch this tutorial on proper control joint installation: How to cut concrete control joints – Sakrete Pro Tips
Expansion Joints vs. Control Joints: Know the Difference
This is a common point of confusion, even among some contractors. Expansion joints and control joints serve completely different purposes, and you need both for comprehensive crack prevention. This directly impacts concrete cracking for Nashville homeowners.
What Are Expansion Joints?
Expansion joints are compressible material placed between separate concrete elements (like where a driveway meets a garage floor, or between driveway sections poured on different days). They allow adjacent slabs to expand and contract independently without transferring stress to each other. Understanding concrete cracking helps you make better decisions.
Think of expansion joints as shock absorbers between rigid concrete sections. They’re typically 1/2″ to 1″ thick and made from flexible materials like: This is a key factor in concrete cracking considerations.
- Asphalt-impregnated fiber board
- Closed-cell foam
- Rubber expansion joint material
- Pre-molded joint filler
Where Expansion Joints Are Required in Nashville
You absolutely need expansion joints:
- Where driveways meet garage floors
- Where sidewalks intersect with building foundations
- Around columns or posts embedded in slabs
- At transition points between old and new concrete
- Every 40-60 feet in long driveways
I recently visited a property in Brentwood where the homeowner’s 80-foot driveway had zero expansion joints. After two years, the entire surface had developed a continuous crack running down the middle. Adding expansion joints every 40 feet would have cost an extra $200 during installation—way less than the $3,500 they ended up spending on concrete crack repair services. For concrete cracking, this matters significantly.
Proper Expansion Joint Installation
The expansion joint material should extend the full depth of the slab and be wide enough to accommodate expected movement (typically 1/2″ for Nashville conditions). After installation, seal the top with a flexible polyurethane joint sealant to prevent water infiltration while still allowing compression and expansion. Regarding concrete cracking, Nashville experts recommend this approach.
Concrete Reinforcement Methods That Actually Work
Control joints manage shrinkage cracking, but what about structural loads? That’s where reinforcement comes in. Nashville driveways face constant stress from vehicles, delivery trucks, and our infamous soil movement. Proper reinforcement is your insurance policy against settlement cracks and structural failure. This plays a major role in concrete cracking outcomes.
Rebar vs. Wire Mesh vs. Fiber Reinforcement
Let’s cut through the confusion—these three reinforcement methods serve different purposes:
Rebar (Steel Reinforcing Bars)
- Best for: High-load areas, structural slabs, areas prone to settlement
- Typical spec: #4 rebar (1/2″ diameter) in 12-18″ grid, positioned at mid-depth
- Nashville advantage: Excellent for our expansive clay soils
- Limitation: Must be properly elevated (not sitting on subgrade) to be effective
Wire Mesh (WWF – Welded Wire Fabric)
- Best for: Residential driveways, patios, sidewalks
- Typical spec: 6×6 W1.4xW1.4 (6″ grid of 10-gauge wire)
- Nashville advantage: Cost-effective, readily available
- Limitation: Often ends up at the bottom of the slab instead of mid-depth (where it’s useless)
Fiber Reinforcement
- Best for: Controlling plastic shrinkage cracks, reducing crack width
- Typical spec: 1-1.5 lbs per cubic yard of synthetic macro-fibers
- Nashville advantage: Distributes throughout slab, can’t be improperly placed
- Limitation: Doesn’t replace structural reinforcement for load-bearing
My Recommendation for Nashville Conditions
For the best crack prevention in Middle Tennessee, I advocate for a hybrid approach: wire mesh or rebar for structural support, plus fiber reinforcement for shrinkage crack control. Yes, it costs more upfront (typically $0.50-0.75 per square foot additional), but it’s money well spent.
I worked with a contractor on a project in East Nashville where we compared two identical driveways on adjacent properties—one with combination reinforcement, one with just wire mesh. After two winters, the wire-mesh-only driveway had developed three visible cracks. The combination-reinforced driveway? Still perfect.
Proper Reinforcement Placement
Here’s a critical detail most homeowners don’t know: reinforcement only works if it’s positioned correctly. Wire mesh sitting on the ground does absolutely nothing. It needs to be at the mid-point of your slab thickness.
Quality contractors use “chairs” or “bolsters”—small plastic or wire supports that hold the reinforcement at the proper height during the pour. If your contractor is walking on wire mesh laid flat on the ground, that’s a red flag. Insist they elevate it to slab mid-depth.
Learn more about fiber reinforcement benefits: Fiber Reinforced Concrete – T.W. Hicks Inc.
The Curing Process: Where Most DIYers Go Wrong
I’ll be blunt: improper curing causes more concrete failures in Nashville than any other single factor. Most people think concrete “dries.” It doesn’t—it cures through a chemical reaction that requires moisture. Stop the moisture supply too early, and you’ll end up with weak, crack-prone concrete.
Understanding the 28-Day Curing Timeline
Concrete reaches about 70% of its design strength in 7 days and 90% in 28 days—but only if you maintain proper moisture and temperature throughout this period. I’ve tested core samples from Nashville driveways that were only reaching 60% of design strength because curing was completely neglected.
The first 3-7 days are absolutely critical. This is when the bulk of hydration occurs. Let the surface dry out during this window, and you’ll develop plastic shrinkage cracks (those spider-web surface cracks), plus compromise long-term strength and durability.
Proven Curing Methods for Nashville’s Climate
Method 1: Continuous Moisture (The Gold Standard) Cover the concrete with burlap or cotton mats and keep them continuously wet for 7 days. Yes, this is labor-intensive. Yes, it’s worth it. This method produces the strongest, most crack-resistant concrete.
Method 2: Curing Compounds (Most Practical) Apply a liquid membrane-forming curing compound immediately after finishing. These products—typically acrylic or resin-based—seal the surface and prevent moisture loss. Look for products meeting ASTM C309 standards.
For Nashville’s hot summers, I recommend white-pigmented curing compounds that reflect sunlight and keep surface temperatures lower. In spring/fall, clear compounds work fine.
Method 3: Plastic Sheeting (Budget-Friendly) Cover the finished concrete with 6-mil clear polyethylene sheeting, weighted down at the edges. This traps moisture but can cause discoloration if not placed flat. Not my first choice, but better than nothing.
Temperature Considerations for Nashville
Nashville’s weather can swing wildly during construction season. Here’s how to adjust:
Hot Weather (Above 85°F):
- Pour early morning when temperatures are lower
- Use ice in the mix water to lower concrete temperature
- Apply curing compound within 10 minutes of finishing (evaporation happens fast)
- Consider sunshades or temporary cover during curing
- Spray surface with water mist before it dries out
Cold Weather (Below 50°F):
- Use heated enclosures or insulated blankets
- Use concrete with accelerated hardening (Type III cement)
- Extend curing period to 10-14 days
- Protect from freeze damage for at least 7 days
I once consulted on a December pour in Franklin where the contractor insisted on proceeding with a cold snap forecast. We used insulated curing blankets and heated enclosures for 10 days. The concrete performed perfectly. The neighboring property that poured the same week without protection? Severe scaling and surface cracking by spring.
Understanding proper curing techniques: Concrete Curing: Don’t Make These Mistakes
Subgrade Preparation: The Foundation of Crack Prevention
You wouldn’t build a house on quicksand, right? Yet I regularly see contractors pouring $10,000 driveways on poorly prepared subgrade. In Nashville’s clay soil environment, proper subgrade prep isn’t optional—it’s the difference between a driveway that lasts 20 years and one that cracks within 2 years.
Why Subgrade Matters So Much in Middle Tennessee
Remember those expansive clay soils we discussed? They’re sitting right under your concrete, ready to wreak havoc. A properly prepared subgrade serves three critical functions:
- Load distribution: Spreads the weight of your concrete and vehicles over a larger area
- Moisture management: Prevents water accumulation under the slab
- Movement dampening: Reduces the impact of soil expansion/contraction
The Right Way to Prepare Subgrade in Nashville
Step 1: Excavate to Proper Depth Remove all topsoil, organic material, and loose fill. For driveways, you want to reach native soil or well-compacted fill. Minimum depth: 4″ for concrete + 4-6″ for aggregate base = 8-10″ total excavation.
Step 2: Address Drainage This is huge in Nashville. If water pools under your slab, you’re setting yourself up for failure. The subgrade should slope away from structures at 1-2%. For problem areas, install a subdrain system with perforated pipe leading to daylight or a sump.
Step 3: Install Aggregate Base Spread 4-6 inches of crushed limestone (¾” minus is ideal) over the entire area. This base layer serves multiple purposes:
- Provides a stable, non-expansive platform for concrete
- Improves drainage by creating a capillary break
- Reduces frost heave potential
- Helps even out minor soil movements
Step 4: Compact, Compact, Compact This is where contractors most often cut corners. The aggregate base should be compacted to at least 95% of maximum density using a plate compactor or roller. Compact in 2-3″ lifts—don’t try to compact the full 6″ at once.
I use a simple test: walk across the compacted base. If your footprints are deeper than 1/4″, it’s not compacted enough. Professional contractors verify compaction with nuclear density gauges, but for residential work, the footprint test is a decent proxy.
Vapor Barriers: Do You Need One?
For Nashville driveways and exterior slabs, I generally don’t recommend vapor barriers unless you’re in a high water table area. Here’s why: vapor barriers can trap water in the concrete, prolonging curing and potentially causing problems.
However, for interior slabs (garage floors, basement floors) or if you’re planning to install coatings/sealers, a 10-mil polyethylene vapor barrier is essential. It prevents ground moisture from rising through the concrete and causing adhesion problems.
Concrete Sealing: The Final Layer of Protection
Even perfectly installed concrete needs protection from Nashville’s elements. Quality concrete sealing isn’t about making your driveway look pretty (though that’s a nice bonus)—it’s about preventing water infiltration, freeze-thaw damage, and surface deterioration.
Types of Concrete Sealers for Nashville Climate
Penetrating Sealers (Silane/Siloxane)
- How they work: Penetrate into concrete pores and chemically react to repel water
- Best for: Driveways, sidewalks, patios where you want natural appearance
- Nashville advantage: Excellent freeze-thaw protection, breathable
- Typical lifespan: 5-7 years
- Cost: $0.25-0.40 per sq ft
Acrylic Sealers
- How they work: Form a protective film on the concrete surface
- Best for: Decorative concrete, stamped surfaces, pool decks
- Nashville advantage: Enhances color, provides UV protection
- Typical lifespan: 1-3 years (requires more frequent reapplication)
- Cost: $0.15-0.30 per sq ft
Epoxy/Polyurethane Sealers
- How they work: Create a thick, durable coating on the surface
- Best for: Garage floors, high-traffic areas, commercial applications
- Nashville advantage: Excellent chemical resistance, very durable
- Typical lifespan: 5-10+ years
- Cost: $1.50-3.00 per sq ft
When to Apply Sealer
This is crucial: wait at least 28 days before sealing new concrete. The curing process needs to be complete. I’ve seen contractors seal after 7-10 days, which traps residual moisture and can cause delamination or discoloration.
For Nashville’s climate, the ideal sealing windows are:
- Late spring (April-May): After winter damage but before summer heat
- Early fall (September-October): Before freeze-thaw season begins
Avoid sealing when temperatures are below 50°F or above 90°F, or if rain is forecast within 24 hours.
How Often Should You Reseal?
Most penetrating sealers last 5-7 years in Nashville conditions, while acrylics need reapplication every 1-3 years. Here’s a simple test: pour water on your concrete. If it beads up, your sealer is still working. If it soaks in immediately, it’s time to reseal.
Professional concrete sealing services in Nashville typically charge $1.50-3.00 per square foot for complete surface preparation and sealing. For a typical 500 sq ft driveway, expect to invest $750-1,500 for quality work.
Explore sealing options from local specialists:
Concrete Crack Repair: When Prevention Isn’t Enough
Let’s be realistic—even with perfect installation, some cracks might still develop. Nashville’s extreme soil conditions can overwhelm even the best crack prevention measures. The key is addressing problems early before they become structural disasters.
Types of Concrete Cracks and What They Mean
Hairline Shrinkage Cracks (< 1/16″ wide)
- Cause: Normal concrete shrinkage during curing
- Structural concern: Low (primarily cosmetic)
- Fix: Surface sealer or crack filler
- Cost: DIY $20-50, Professional $100-200
Pattern Cracking (Interconnected network)
- Cause: Plastic shrinkage from rapid moisture loss during finishing
- Structural concern: Moderate (can worsen over time)
- Fix: Concrete resurfacing or overlay
- Cost: $3-7 per square foot
Settlement Cracks (Wide, offset edges)
- Cause: Underlying soil movement or poor subgrade
- Structural concern: High (indicates foundation issues)
- Fix: Concrete leveling/mudjacking
- Cost: $5-25 per square foot
Professional Crack Repair Methods
Crack Injection For structural cracks over 1/8″ wide, polyurethane or epoxy injection is the gold standard. The material is pressure-injected deep into the crack, completely filling voids and bonding the concrete back together.
Nashville companies like USS Nashville specialize in this technique. Expect to pay $300-800 per crack depending on length and severity.
PolyLevel Concrete Lifting When cracks result from settlement, raising the slab back to proper level is essential. PolyLevel involves injecting high-density polyurethane foam under the concrete, which expands and lifts the slab.
This modern alternative to traditional mudjacking is faster, cleaner, and more permanent. Ram Jack Nashville and Frontier Basement Systems both offer this service, typically charging $1,200-2,500 for a typical driveway section.
DIY Crack Repair: When It Makes Sense
For hairline cracks (under 1/8″ wide) that aren’t offset, DIY repair is reasonable. Here’s my recommended approach:
- Clean the crack thoroughly with a wire brush and compressed air
- Apply concrete crack filler specifically formulated for your crack width
- Smooth with a putty knife and remove excess
- Allow to cure per manufacturer instructions (typically 24-48 hours)
- Seal the entire surface to blend the repair and protect against future damage
Quality crack repair products include Quikrete Concrete Crack Seal, Sakrete Crack Filler, or Sika Self-Leveling Sealant. Budget $15-30 per tube, with each tube covering approximately 15-20 feet of crack.
Frequently Asked Questions About Concrete Crack Prevention
How much does it cost to prevent concrete cracking in Nashville?
Prevention measures add approximately 10-20% to standard concrete installation costs. For a typical 500 sq ft driveway costing $3,000-4,000, comprehensive crack prevention (proper joints, reinforcement, curing, and sealing) adds $300-800. Compare this to crack repair costs of $1,500-3,500 down the road, and prevention is clearly worth the investment.
For more details on pricing, check out our comprehensive Nashville Premier Concrete Cost Guide 2025.
What’s the best time of year to pour concrete in Tennessee?
Late spring (April-May) and early fall (September-October) provide ideal conditions in Nashville. Temperatures are moderate (55-75°F), humidity is manageable, and extreme weather is less likely. Avoid pouring during summer heat waves or when frost is possible.
How long does concrete need to cure before I can drive on it?
Wait at least 7 days before allowing light vehicle traffic on new concrete. For full strength and optimal crack resistance, the 28-day full cure is recommended before subjecting concrete to heavy loads like large trucks or RVs.
Do I need both rebar and fiber reinforcement?
For Nashville’s challenging conditions, I recommend both. Rebar or wire mesh provides structural reinforcement against settlement and heavy loads. Fiber reinforcement controls shrinkage cracking. The combination costs more upfront but significantly improves long-term performance.
How often should I seal my concrete driveway?
With penetrating sealers, every 5-7 years is typical for Nashville conditions. Acrylic sealers require reapplication every 1-3 years. Perform the water bead test annually—if water soaks in rather than beading, it’s time to reseal.
Can I pour concrete directly on clay soil?
Technically yes, but it’s not recommended in Nashville. Our expansive clay soils move too much. Always install at least 4-6 inches of compacted aggregate base between clay soil and concrete. This base layer absorbs soil movement and provides stable support.
What’s the difference between mudjacking and PolyLevel?
Mudjacking uses a heavy cement slurry pumped under concrete to lift it. PolyLevel uses lightweight polyurethane foam. PolyLevel is faster (cures in 15 minutes vs. 24+ hours), lighter (won’t add stress to soil), more precise, and longer-lasting. It costs 20-30% more but is worth it for Nashville’s soil conditions.
Will sealing prevent all cracks?
No. Sealing protects against surface damage, water infiltration, and freeze-thaw deterioration—which reduces one major cause of cracking. However, sealing alone won’t prevent cracks from settlement, inadequate reinforcement, or improper jointing. Think of sealing as one layer in a comprehensive prevention strategy.
Choosing the Right Nashville Concrete Contractor
Even armed with all this knowledge, your crack prevention efforts ultimately depend on contractor quality. I’ve seen too many homeowners do everything right on paper, only to have contractors take shortcuts during execution.
Red Flags to Watch For
- No discussion of control joints or “we’ll cut them if needed”
- Wire mesh laid flat on ground without elevation supports
- No aggregate base or less than 4 inches
- Rushing the curing process or no curing compound application
- No written warranty or vague guarantee terms
- Significantly cheaper than competitors (usually for good reason)
Questions to Ask Before Hiring
- “What control joint spacing will you use and why?”
- “How will you ensure reinforcement is at proper height?”
- “What thickness aggregate base will you install and to what compaction standard?”
- “What curing method will you use and for how long?”
- “Do you provide written warranty, and what does it cover?”
- “Can you provide references from projects completed 3+ years ago?”
Top-Rated Nashville Concrete Contractors
Based on local reputation, Better Business Bureau ratings, and customer feedback:
- Nashville Concrete Corp
- Jones Concrete Nashville
- All Things Outdoors Concrete
- Concrete Craft Nashville
- Music City Excavation
For specialized services like stamped concrete, decorative overlays, or high-end finishes, these companies maintain craftsmen specifically trained in advanced techniques.
The Bottom Line: Investing in Prevention
Look, I get it. When you’re already spending $4,000-8,000 on a new driveway, the last thing you want to hear is that you should spend more on prevention measures you can’t even see. But here’s the reality check: proper crack prevention costs 10-20% more during installation and can extend your concrete’s lifespan from 10-15 years to 25-30+ years.
The math is straightforward. A typical Nashville driveway costs $3,000-5,000. Adding comprehensive crack prevention (proper joints, reinforcement, aggregate base, curing, and initial sealing) runs another $400-800. If that investment doubles your concrete’s useful life, you’re saving thousands versus premature replacement.
More importantly, you’re avoiding the headache, disruption, and appearance issues that come with cracked, settled concrete. There’s real value in pulling into a beautiful, crack-free driveway every day for decades.
Your Action Plan
If you’re planning a concrete project in Nashville:
- Start with soil testing if you’re in an area prone to settlement issues (your contractor should know problem areas)
- Spec out control joints at appropriate spacing before the pour
- Insist on proper subgrade prep with minimum 4″ compacted aggregate base
- Choose combination reinforcement (structural + fiber) for best performance
- Plan for proper curing—don’t let contractors rush this critical phase
- Budget for quality sealing 28+ days after installation
- Schedule periodic maintenance to catch small issues before they become big problems
Nashville’s climate and soil conditions make concrete work challenging, but armed with the right knowledge and a quality contractor, you can absolutely achieve crack-free concrete that performs beautifully for decades.
Ready to Get Started?
For detailed cost breakdowns and planning guidance:
- Review Nashville Premier Concrete Cost Guide 2025
- Compare Concrete vs. Asphalt costs in Nashville
- Understand financing options available
- Calculate potential ROI and home value impact
Remember: an ounce of prevention really is worth a pound of cure—especially when we’re talking about preventing expensive concrete crack repairs down the road.
Additional Resources:
Video Tutorials:
- The Types of Concrete Cracks and How to Prevent Them
- Why Does Concrete Crack? – Creating Concrete
- Ensure Proper Concrete Curing Time
Industry Resources:
- American Concrete Institute (ACI) guidelines on crack control
- National Ready Mixed Concrete Association (NRMCA) best practices
- Portland Cement Association technical papers on crack prevention
Local Nashville Services:
- Foundation repair and concrete leveling specialists
- Professional concrete sealing services
- Decorative concrete contractors
- Concrete testing and analysis labs
By following these comprehensive crack prevention strategies, you’ll join the minority of Nashville homeowners whose concrete looks as good in year 20 as it did in year 1. Here’s to crack-free concrete!